
Quick Start Guide
Get up and running in 5 minutes
1
Install the App
- Download Sophist
- Drag to Applications folder
- Double-click to launch
2
Grant Permissions
Upon first launch, macOS will ask for permissions. All four are required for full functionality.
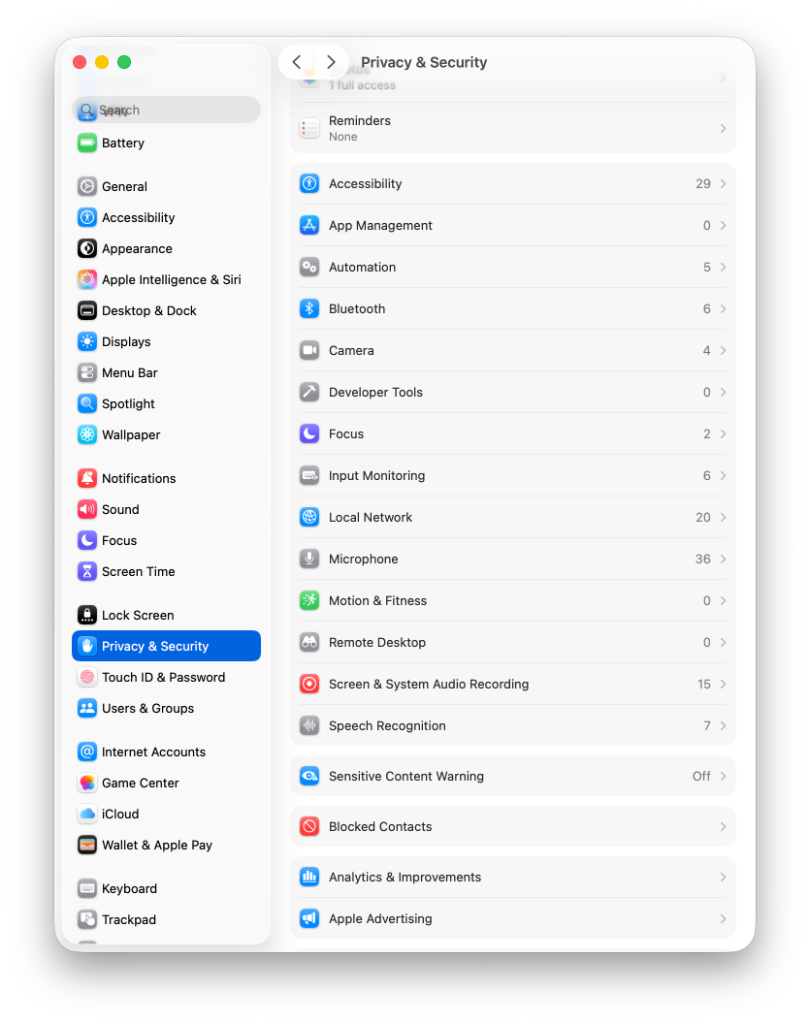
Microphone Access
- •When prompted, click OK to allow microphone access
- •If missed: System Settings → Privacy & Security → Microphone → Enable Sophist
Accessibility Access
- •Open System Settings
- •Go to Privacy & Security → Accessibility
- •Click the lock icon (bottom left) to unlock
- •Click + and add Sophist from Applications
- •Ensure the toggle is ON
Input Monitoring
- •Open System Settings
- •Go to Privacy & Security → Input Monitoring
- •Click the lock icon to unlock
- •Click + and add Sophist from Applications
- •Ensure the toggle is ON
Screen Recording (Optional)(Optional)
- •Required only for Compose Mode's screenshot-based context feature
- •System Settings → Privacy & Security → Screen Recording → Enable Sophist
3
Configure Your STT Provider
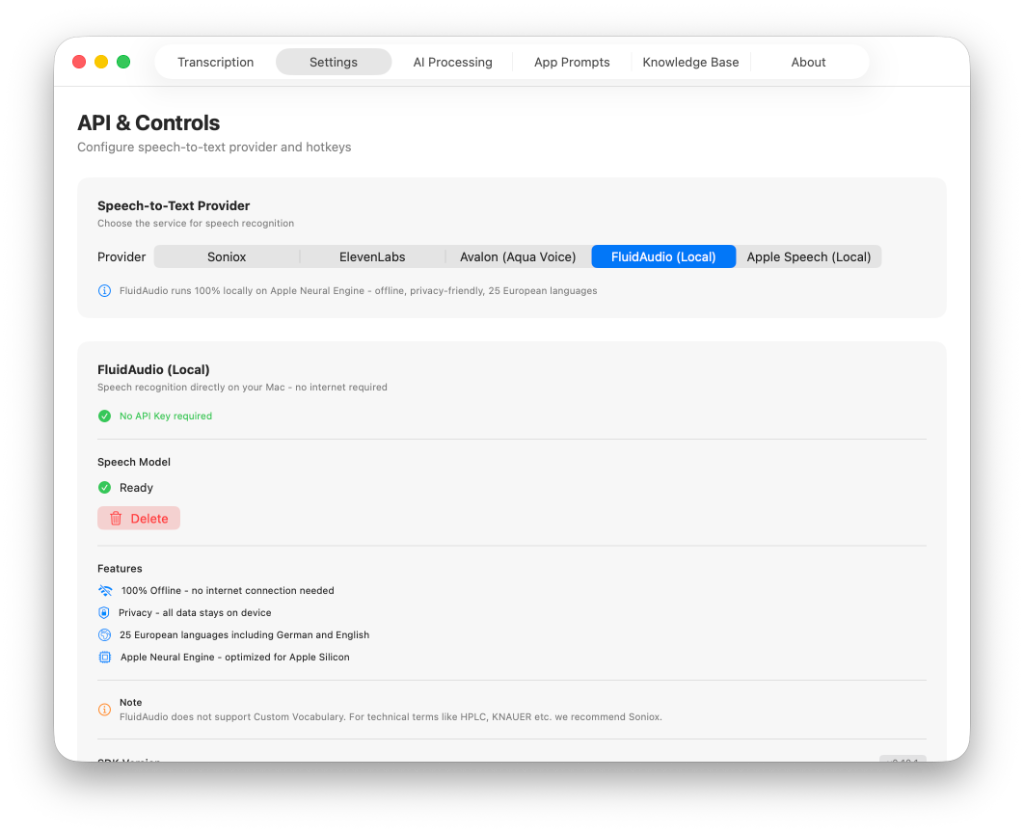
- Click the Sophist icon in the menu bar
- Select Settings
- Go to the API tab
- Choose your provider and enter API key (if required)
| Provider | API Key Required? |
|---|---|
| Soniox | Yes |
| ElevenLabs | Yes |
| Avalon | Yes |
| FluidAudio | No (local) |
| Apple Speech | No (local) |
4
Start Dictating
- Place your cursor in any text field
- Press and hold the Fn key (default hotkey)
- Speak clearly
- Release the key
- Your text appears at the cursor
You're Ready!
Explore more features:
⌘KOpen Command Palette
⌘⇧POpen Pendenz (Tasks)
⌘,Open Settings
Troubleshooting
No recording→ Check Microphone permission
Text not inserting→ Check Accessibility permission
Hotkey not working→ Check Input Monitoring permission
Hotkey conflicts→ Check System Settings → Keyboard → Shortcuts